
Blogs
Painting Concrete Steps: Step-by-Step Guide
Concrete steps, whether leading to your front door, patio, or garage, are highly functional but often lack visual appeal. Over time, they can become stained, discolored, or just plain dull. Painting concrete steps is an effective and economical way to revitalize their appearance, offering both an attractive finish and an added layer of protection. This guide will walk you through the process, ensuring your painted steps are both beautiful and durable.
Why painting concrete steps is a smart choice
Painting your concrete steps offers several compelling benefits that go beyond just aesthetics:
Enhanced Curb Appeal: A fresh coat of paint can dramatically improve the look of your steps, making them a more inviting and attractive feature of your home's exterior or interior.
Protection from Elements: Paint acts as a barrier, protecting the concrete from moisture, UV rays, freeze-thaw cycles, and general wear and tear, which can prolong the life of your steps.
Conceals Imperfections: Paint can cover minor stains, discoloration, and small surface imperfections that might be visible on bare concrete, giving a more uniform and polished look.
Easier Cleaning: Painted surfaces are generally smoother and less porous than bare concrete, making them easier to sweep, wash, and keep clean from dirt and debris.
Increased Safety: Anti-slip additives can be incorporated into concrete paint or sealer, providing extra traction and reducing the risk of slips and falls, especially in wet conditions.
Personalization: With a wide range of colors and finishes available, you can customize your steps to match your home's exterior, landscaping, or interior decor.
Cost-Effective Renovation: Painting is significantly less expensive than replacing concrete steps or applying more elaborate finishes, offering a high-impact transformation for a relatively low cost.
Tools and materials needed for concrete step painting
Before you start, gather all the necessary tools and materials to ensure a smooth and efficient painting process.
Safety Gear:
Work gloves
Safety glasses
Dust mask or respirator
Cleaning Supplies:
Stiff-bristled brush or push broom
Garden hose with nozzle or pressure washer
Concrete cleaner/degreaser (e.g., TSP – Trisodium Phosphate, or an eco-friendly alternative)
Buckets
Scrub brush
Repair Materials:
Concrete patch or crack filler (if needed)
Trowel or putty knife
Preparation Supplies:
Painter's tape (blue painter's tape for outdoor use is ideal)
Plastic sheeting or old newspapers (to protect adjacent surfaces)
Painting Supplies:
Paint rollers (3/8" nap for smooth concrete, 1/2" nap for rougher surfaces)
Roller extension pole
Paint trays
Angled sash brush (2-3 inches) for edges and corners
Concrete primer (etching primer or an all-purpose exterior masonry primer)
Concrete paint or stain (epoxy-based, acrylic latex, or specialized porch/patio paint)
Concrete sealer (optional, but highly recommended for added durability)
Anti-slip additive (optional, for improved traction)
Stir sticks
Paint can opener
Step 1 – Clean and prepare the concrete surface
Proper surface preparation is the most critical factor for paint adhesion and a long-lasting finish on concrete steps.
Clear the Area: Remove any potted plants, doormats, or other items from the steps and surrounding area. Sweep the steps thoroughly with a stiff-bristled brush or push broom to remove loose dirt, leaves, and debris.
Inspect and Repair: Carefully inspect the concrete for any cracks, chips, or spalling (flaking surface).
For small cracks or chips, use a concrete crack filler or patch compound. Apply it with a trowel or putty knife, smoothing it flush with the surrounding surface. Allow it to cure completely according to the manufacturer's instructions.
For larger repairs, you might need a more substantial concrete patching mix.
Deep Clean with Degreaser: Mix your concrete cleaner/degreaser (like TSP or a dedicated concrete cleaner) according to the product instructions. Apply the solution to the steps, then scrub vigorously with a stiff brush to remove embedded dirt, oil, grease, mold, mildew, and efflorescence (white powdery deposits).
Tip: For stubborn stains, allow the cleaner to sit for the recommended dwell time before scrubbing.
Rinse Thoroughly: Rinse the steps exceptionally well with a garden hose or pressure washer. It's crucial to remove all traces of the cleaning solution, as residue can prevent paint from adhering. Continue rinsing until the water runs clear and no suds remain.
Allow to Dry Completely: This step cannot be rushed. Concrete is porous and holds moisture. Allow the steps to dry for at least 24-48 hours, or even longer in humid conditions. Any trapped moisture can lead to paint peeling or blistering. You can use a leaf blower or a fan to speed up drying if indoors.
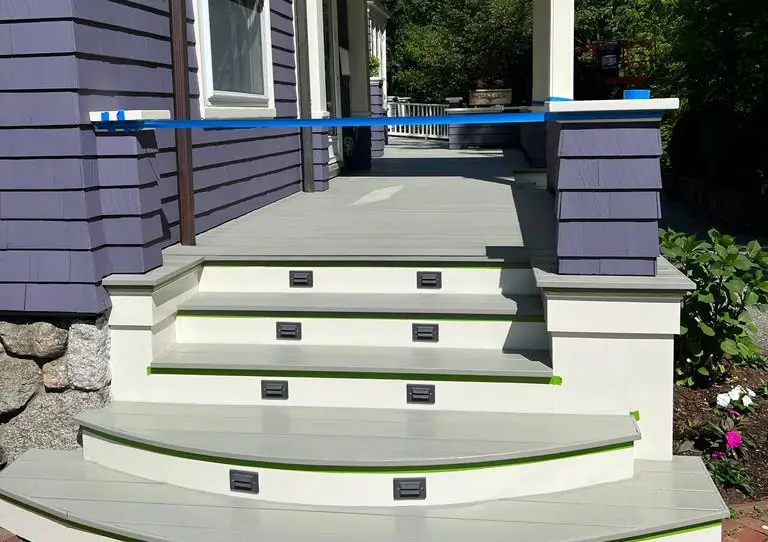
Mask Off Adjacent Areas: Once the steps are completely dry, use painter's tape to mask off any areas you don't want to paint, such as adjacent walls, siding, risers (if you're only painting the treads), or garden beds. Lay plastic sheeting or newspaper over nearby plants or surfaces that could be affected by paint splatter.
Step 2 – Apply primer for better adhesion
Priming is a crucial step for ensuring maximum adhesion of the paint to the porous concrete and achieving a uniform final color.
Choose the Right Primer: Select a primer specifically designed for concrete or masonry. An etching primer is often recommended for new or bare concrete as it slightly etches the surface, creating a stronger bond. For previously painted or very smooth concrete, a high-quality bonding primer will work well. Ensure your primer is compatible with your chosen paint type (e.g., water-based primer for acrylic paint).
Mix the Primer: Stir the primer thoroughly before use.
Apply the First Coat: Using your angled brush, carefully cut in along the masked edges, corners, and any areas a roller can't reach. Then, use your roller with an extension pole to apply a thin, even coat of primer to the main flat surfaces of the steps.
Technique: Work from the top step down, applying the primer in sections and ensuring full coverage without heavy pooling.
Allow to Dry: Let the first coat of primer dry completely according to the manufacturer's instructions. This usually takes 2-4 hours.
Apply Second Coat (If Recommended): Some primers recommend a second coat for optimal results, especially on very porous or uneven surfaces. If so, apply a second thin coat after the first has dried, following the same technique.
Light Sanding (Optional): For an exceptionally smooth finish, you can lightly sand the dried primer with fine-grit sandpaper (e.g., 220-grit) to remove any minor imperfections or roller marks. Wipe away all dust with a tack cloth before painting.
Step 3 – Paint and seal the concrete steps
Now that the surface is prepped and primed, it's time to apply the color and protect your work.
Stir the Paint: Thoroughly stir your chosen concrete paint before and during use to ensure consistent color and proper mixing of any additives. If using an anti-slip additive, mix it into the paint according to the product instructions.
First Coat of Paint:
Methodical Approach: Start by using your angled brush to paint the edges, corners, and areas around the masking tape.
Rolling: Immediately follow with your roller to apply a thin, even coat of paint to the treads and risers. Work from the top step down.
Tip: If you need to keep one side of the steps accessible, paint every other step, allow it to dry completely, then paint the remaining steps.
Avoid Over-Application: Apply paint in thin, even coats to prevent drips and ensure proper curing.
Allow to Dry: Let the first coat of paint dry completely according to the manufacturer's instructions. This can vary from 4-8 hours. Do not walk on the steps during this time.
Second Coat of Paint: Apply a second thin, even coat of paint, following the same technique as the first. Most concrete paints require two coats for full color saturation, durability, and even coverage. If you used a contrasting color for the primer, a third coat might be necessary.
Apply Sealer (Optional but Recommended): Once the final coat of paint is completely dry (check manufacturer's recommendations for paint, typically 24-48 hours), it's time to apply the concrete sealer. This step is highly recommended for outdoor steps as it provides an extra layer of protection against wear, UV damage, and moisture.
Application: Apply the sealer in thin, even coats using a roller and brush, similar to how you applied the paint. Most sealers require two coats. Allow adequate drying time between coats and for the final coat. If you added an anti-slip additive to the paint, you can also add it to the sealer for maximum traction.
Curing Time and Tape Removal:
Remove Tape: Carefully remove the painter's tape while the final coat of paint (or sealer, if used) is still slightly pliable, but not wet. If the paint is completely dry, score the edge of the tape with a utility knife to prevent paint from peeling with the tape.
Curing: Allow the painted and sealed steps to cure for the recommended time (often 3-7 days for light foot traffic, and up to 30 days for full hardness). Avoid heavy use, placing heavy objects, or dragging items across the steps during this period to ensure maximum durability.
Best paints and sealers for outdoor concrete
Choosing the right products is paramount for a long-lasting and attractive finish on outdoor concrete steps, which face significant environmental stress.
Best paints for outdoor concrete steps:
Epoxy Concrete Paint:
Pros: Extremely durable, highly resistant to abrasion, chemicals, oil, and moisture. Provides a very hard, long-lasting finish. Excellent adhesion.
Cons: Can be more expensive, often a two-part system requiring precise mixing, and has a shorter pot life. Application can be more challenging for DIYers.
Ideal for: High-traffic areas, garage steps, or steps needing maximum resilience.
100% Acrylic Latex Concrete Paint (Porch & Patio Paint):
Pros: Widely available, easy to apply (water-based), low-VOC, good adhesion, and resistant to mildew, fading, and chipping. Flexible enough to handle some concrete movement. Many come with built-in anti-slip properties or can have additives mixed in.
Cons: Not as hard or chemical-resistant as epoxy, but still very durable for most residential applications.
Ideal for: Most residential outdoor concrete steps, offering a good balance of durability, ease of use, and aesthetics.
Elastomeric Masonry Paint:
Pros: Highly flexible and elastic, designed to bridge hairline cracks and prevent moisture penetration. Offers excellent waterproofing and protection.
Cons: Can be thicker, sometimes requiring specific application techniques.
Ideal for: Concrete steps prone to minor cracking or in very wet environments where waterproofing is a high priority.
Best sealers for outdoor concrete steps:
While many concrete paints offer some level of protection, adding a dedicated sealer significantly enhances durability and lifespan.
Acrylic Concrete Sealers:
Pros: Popular and versatile. Available in water-based or solvent-based formulas. They penetrate the concrete, forming a protective layer that resists water, stains, and abrasion. Often enhance color.
Finishes: Available in matte, satin, or gloss.
Ideal for: General-purpose sealing over painted concrete steps.
Polyurethane Concrete Sealers:
Pros: Extremely durable and abrasion-resistant, offering a harder, longer-lasting finish than acrylics. Excellent chemical resistance and UV protection.
Cons: Can be more expensive and typically solvent-based (stronger fumes).
Ideal for: High-traffic steps or those exposed to harsh conditions where maximum protection is desired.
Epoxy Sealers:
Pros: Similar to epoxy paints, these provide exceptional hardness, chemical resistance, and a very strong bond.
Cons: Can be a two-part system and more challenging to apply.
Ideal for: Industrial-strength protection or when used in conjunction with epoxy paint for the ultimate durable system.
Important considerations for paint and sealers:
Anti-Slip Additives: For safety, always consider mixing a clear anti-slip additive (e.g., fine sand or polymer beads) into your paint's final coat or into the sealer. Many porch and patio paints come with this built-in.
Compatibility: Always ensure your primer, paint, and sealer are compatible with each other. Check product labels for recommendations.
Manufacturer Instructions: Strictly follow the manufacturer's instructions for mixing, application, drying times, and curing times for all products. These can vary significantly.
With careful preparation and the right materials, your concrete steps can go from drab to fab, creating a welcoming and attractive entrance to your home for years to come!
For a professional, long-lasting finish on your concrete steps, trust the expertise of Masterpiece Painter. We handle all the intricate details, from thorough cleaning to expert application, ensuring a stunning and durable transformation. Contact us today for a consultation and a free estimate!

About Masterpiece Painter
For over 17 years Masterpiece Painter, has been serving communities all around New England. Let us help you make your wishes come true by turning your property into a Masterpiece
Get a Quote
Contact Us


© copyright 2023 All Rights Reserved.