
Blogs
How to paint a fireplace? Brick & wood guide
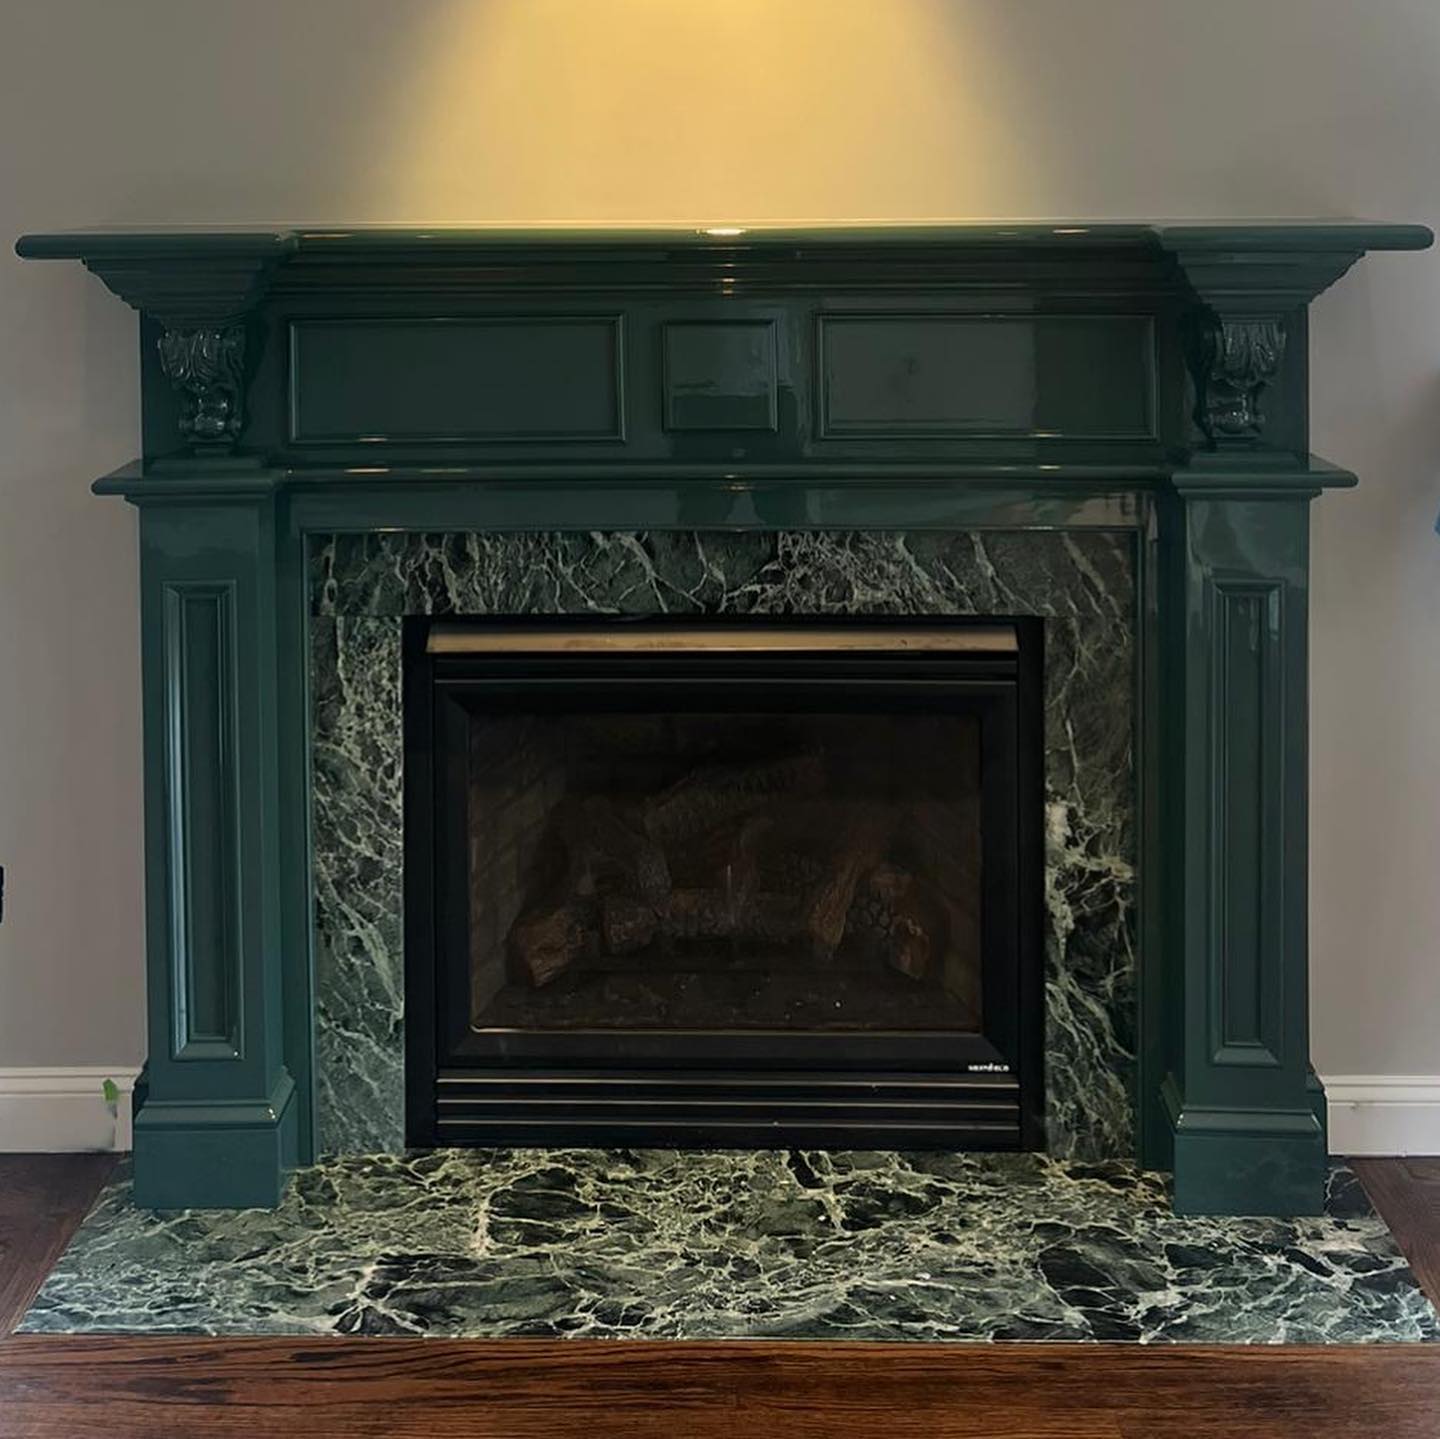
A fireplace is often the focal point of a room, but a dated or dingy one can detract from your home's aesthetic. A fresh coat of paint can dramatically transform its appearance, bringing new life to your living space. Painting a fireplace, whether brick, stone, or wood, requires specific preparation and products to ensure a long-lasting and beautiful finish. Masterpiece Painter guides you through the process, from meticulous cleaning to the final flawless coat.
Important Note: This guide focuses on painting the exterior surfaces of a fireplace and its surrounding areas (hearth, mantel, surround). Never paint the firebox (the interior area where the fire burns) with regular paint, as it's not designed for extreme heat and can release toxic fumes. Always ensure the fireplace has not been used for at least 24-48 hours (or longer, if it felt warm) before you begin.
Brace for impact: Inspect and brush out debris
Before you even think about cleaning, a thorough inspection and initial debris removal are crucial.
Safety First: Protect your floor and surrounding furniture with drop cloths. Wear old clothes, gloves, and a dust mask.
Inspect for Damage: Carefully examine the fireplace surface (brick, stone, tile, or wood) for any cracks, crumbling mortar, loose grout, or efflorescence (a white powdery residue caused by moisture). Address these repairs before painting. Repair crumbling mortar or cracks with a suitable masonry repair compound. For efflorescence, it usually indicates a moisture issue that needs to be resolved first, and the surface must be thoroughly cleaned with a specialized efflorescence remover.
Brush Out Loose Debris: Use a stiff wire brush (for masonry) or a nylon brush (for wood) to vigorously scrub away any loose mortar, crumbling bits, old paint flakes, or general dust and cobwebs. Pay close attention to mortar lines and crevices.
Vacuum Thoroughly: Use a shop vac or a powerful household vacuum with a brush attachment to suck up all the dislodged debris, dust, and any remaining cobwebs. This dry cleaning step is essential for removing particulates that would interfere with paint adhesion.
Clean soot and allow 24‑Hr drying
Soot and grime are common on fireplaces and must be completely removed for paint to adhere properly and to prevent stains from bleeding through.
Choose the Right Cleaner:
For Light Soot/Dirt: A mixture of warm water and a heavy-duty degreaser or dish soap can work.
For Heavy Soot/Stains: Use a specialized TSP (trisodium phosphate) substitute cleaner (TSP is very strong, wear gloves and eye protection, ensure good ventilation) or a dedicated fireplace cleaner.
Application:
Mix your cleaner according to package directions.
Using a stiff bristle brush (for masonry) or a sponge/cloth (for smoother surfaces), apply the cleaner.
Scrub vigorously, working in small sections, to lift all soot, grease, and grime.
Rinse Thoroughly: This is critical. Use clean water and fresh cloths/sponges to rinse the surface repeatedly until all traces of the cleaner and soot are gone. Any residue will cause adhesion problems or discoloration.
Allow 24-Hr Drying (or More): After cleaning and rinsing, the surface must be completely dry. Even if it feels dry to the touch, moisture can linger within porous materials like brick or stone. Allow at least 24 hours of drying time, and even longer (48-72 hours) in humid conditions or for very porous materials. Adequate drying prevents moisture from being trapped under the paint, which can lead to bubbling, peeling, or mildew. Use fans to aid ventilation if needed.
Prime thoroughly: Masonry primer in mortar lines
Priming is the critical step that ensures proper adhesion, blocks stains, and provides a uniform surface for your topcoat. Never skip it when painting a fireplace.
Choose the Right Primer:
For Masonry (Brick, Stone): Use a high-quality, stain-blocking, bonding primer specifically formulated for masonry surfaces. This type of primer is designed to seal porous surfaces, prevent efflorescence, and, most importantly, block smoke, soot, and tannin stains from bleeding through your final paint color. Look for oil-based or shellac-based stain-blocking primers for heavy soot, or a good quality water-based masonry primer for lighter stains.
For Wood Surrounds/Mantel: Use a high-quality, all-purpose, stain-blocking primer. Oil-based primers are excellent for blocking wood tannins and providing a smooth base.
Application:
Brush for Mortar Lines: Use a good quality brush to work the primer thoroughly into all the mortar lines and porous areas of masonry. Ensure full coverage, as these areas are often the most problematic for stain bleed-through.
Brush or Roller for Flat Surfaces: Use a roller for larger, flatter areas. A roller with a longer nap (e.g., 3/8-inch to 1/2-inch) is good for textured masonry, while a shorter nap (1/4-inch to 3/8-inch) is ideal for smoother wood.
Even Coat: Apply a thin, even coat. Avoid overloading the brush or roller, which can lead to drips.
Drying: Allow the primer to dry completely according to the manufacturer's instructions. Some heavily stained fireplaces may benefit from a second coat of primer, especially with an oil-based stain blocker, to ensure complete sealing.
Paint with brush + Roller: Two coats, choose matte/satin
The topcoat provides the final color and finish, transforming the look of your fireplace.
Choose the Right Paint:
For Masonry (Brick, Stone): Use a high-quality, 100% acrylic latex paint specifically formulated for exterior or interior masonry. These paints are durable, flexible, and resistant to chipping and fading.
For Wood Surrounds/Mantel: Use a high-quality interior acrylic latex enamel for durability and washability.
Sheen Options:
Matte/Flat: Creates a very soft, sophisticated, and non-reflective look. Excellent for camouflaging minor imperfections on masonry and offering a deep, rich color. Ideal for a subtle, modern aesthetic.
Satin/Eggshell: Offers a slight sheen that reflects a bit of light, making the surface easier to clean and more durable. It's a good choice for a balance of subtle luster and practicality. Avoid high-gloss finishes on fireplaces, as they can highlight imperfections and look overly reflective.
Application:
First Coat: Apply the first coat of paint using a combination of brush and roller. Use a brush to get into all the mortar lines and crevices, then follow immediately with a roller for larger flat areas. Ensure good, even coverage.
Drying Time: Allow the first coat to dry completely according to the paint manufacturer's instructions (usually 2-4 hours).
Second Coat: Apply a second thin, even coat. Two thin coats always provide better coverage, durability, and a smoother finish than one thick coat.
Full Curing: While dry to the touch quickly, paint needs several days (or even weeks for darker colors or humid conditions) to fully cure and reach its maximum hardness. Avoid heavy scrubbing or bumping during this time.
Painting mantel & trim: Coordinate finish
The mantel and surrounding trim pieces require careful attention to ensure a cohesive and polished look.
Prep: If the mantel is wood, ensure it's clean, sanded smooth, and primed (as detailed above for wood surrounds). If it's masonry, follow the masonry prep steps.
Coordinate Finish:
Matching Sheen: For a seamless look, use the same sheen (matte, satin, or semi-gloss) on the mantel as you use on the main fireplace surface or on other trim in the room. If the fireplace body is matte, a satin mantel can add a subtle contrast.
Contrasting Color: You might choose to paint the mantel a contrasting color to make it pop, or keep it the same color as the fireplace body for a uniform, minimalist look.
Tool Tips: For the mantel, use a high-quality angled brush for precise cutting in, and a small foam roller or short-nap roller for smooth, even application on flat surfaces.
For wood surrounds: Oil/alkyd low sheen recommended & tool tips
If your fireplace features a wood surround rather than masonry, the paint choice and application differ slightly.
Recommended Paint Type: For wood surrounds, particularly those that see some handling or exposure, an oil-based (alkyd) enamel or a high-quality acrylic alkyd enamel in a low sheen (satin or semi-gloss) is often recommended.
Oil/Alkyd Benefits: These paints dry to a harder, more durable finish that resists chipping and scratching better than standard latex paints. They also provide excellent flow and leveling, resulting in a smoother, more furniture-like finish. Acrylic alkyds offer similar durability with easier water cleanup.
Low Sheen: A low sheen helps hide minor imperfections and provides an elegant, less reflective look compared to high-gloss.
Tool Tips for Wood:
Brushes: Use a high-quality angled sash brush for cutting in crisp lines and for painting detailed areas. For oil/alkyd paints, natural bristle brushes are often preferred, while synthetic brushes work well for acrylic alkyds.
Rollers: Use a small, high-density foam roller or a very short-nap (1/4-inch) roller for smooth, even application on flat wood surfaces. This minimizes brush marks and ensures a uniform finish.
Taping: Use painter's tape to protect adjacent walls or flooring for clean lines.
Heat-resistance & interior safety tips
Safety is paramount when painting and using a fireplace.
DO NOT PAINT THE FIREBOX: As mentioned, never paint the interior firebox. Regular paints are not designed for extreme heat, will blister, peel, and can release toxic fumes when burned. If the firebox needs a refresh, use a specialized high-heat fireplace paint (often a flat black spray paint) designed for temperatures up to 1200°F (650°C).
Ventilation: Ensure excellent ventilation throughout the painting process. Open windows and use fans to circulate air, especially when using oil-based primers or paints, which have stronger fumes.
Curing Time Before Use: Even after the paint feels dry, it needs time to fully cure and off-gas. Wait at least 72 hours to a week after the final coat before using the fireplace. For high-heat paints in the firebox, follow their specific curing instructions, which often involve a series of low-heat fires.
Carbon Monoxide Detector: Always have a working carbon monoxide detector near any fireplace.
Flammable Materials: Keep all painting materials (cans, rags) away from any heat sources. Dispose of paint-soaked rags properly (often by soaking in water and then placing in a sealed bag to prevent spontaneous combustion, check local guidelines).
By meticulously following these steps, you can safely and effectively paint your fireplace, transforming it into a stunning and refreshed focal point for your home.
Ready to give your fireplace a professional, lasting transformation? Masterpiece Painter specializes in expert interior painting, including meticulous fireplace makeovers. Our team ensures proper preparation, the right coatings for durability, and a flawless finish that revitalizes your living space. Contact us today for a consultation and let us help you achieve a truly stunning centerpiece for your home!

About Masterpiece Painter
For over 17 years Masterpiece Painter, has been serving communities all around New England. Let us help you make your wishes come true by turning your property into a Masterpiece
Get a Quote
Contact Us


© copyright 2023 All Rights Reserved.